|
|
||||||||||||
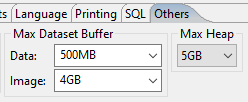
[ Max Memory Size Setup ]To load entire image datasets into main main memory, you need to setup maxium memory size as in the following figure. From "File" menu, select "Properties". Then click "Others" tab. Then you will see the following part. Set "Max Dataset Buffer" - "Image:" size and "Max heap" size. It must be bigger than your largest image dataset but much smaller than your computer's total memory size.
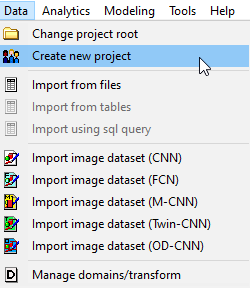
[ Creating a New Project ]To create a new project, from "Data" menu, select "Create new project" and type a name. Then you are ready to use the new project.
[ Importing Training Data ]
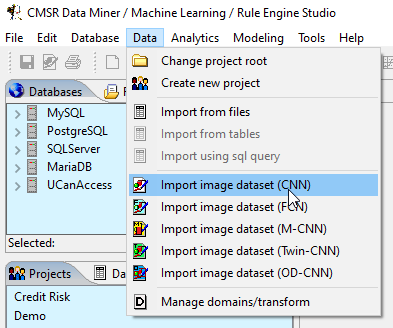
1. To import training data, from "Data" menu, select "Import image dataset (___).
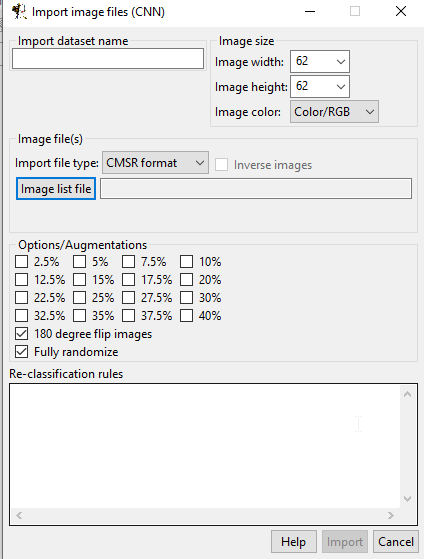
2. Then the following dialog will appear.
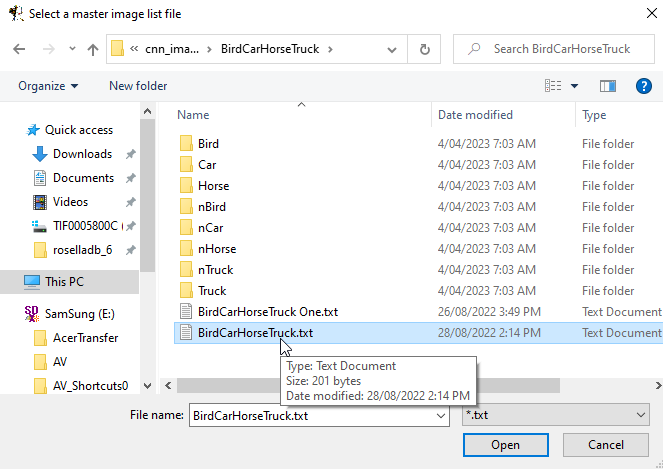
3. Click the "Image list file" button and select your image folder configuration file.
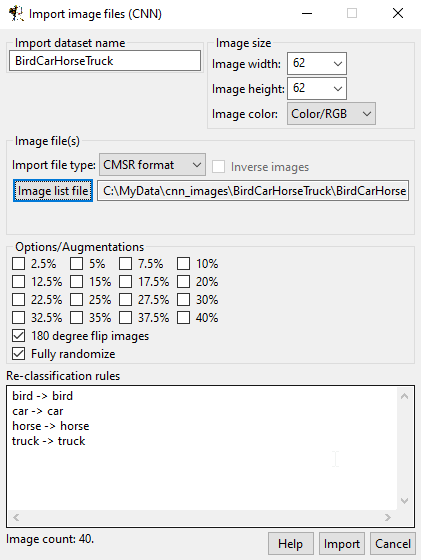
4. Then the following contents will appear.
5. Select augmentation options and press the "Import" button.
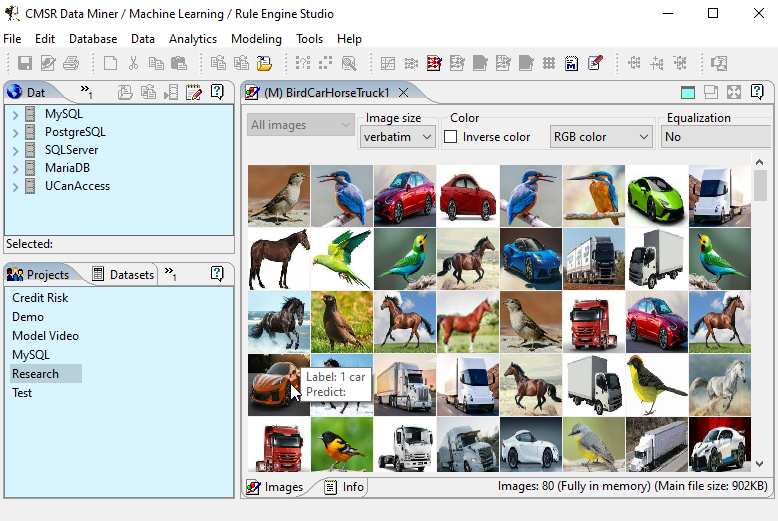
[ Configuring Neural Network ]1. While keeping your image dataset in front, press the following neuralnet button from the tool bar.
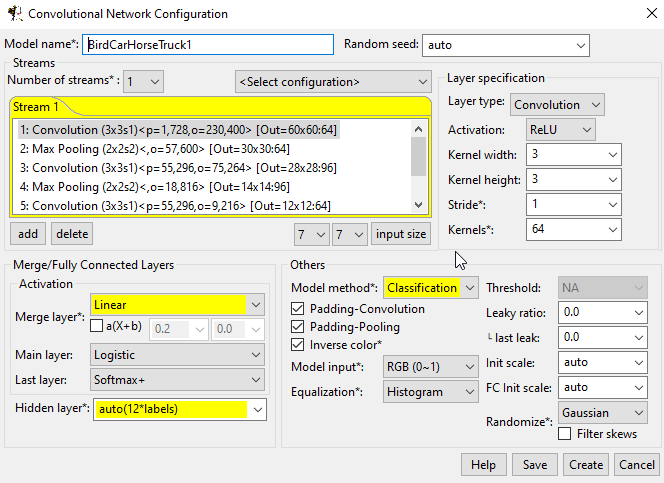
2. Then you will be presented with the following dialog window.
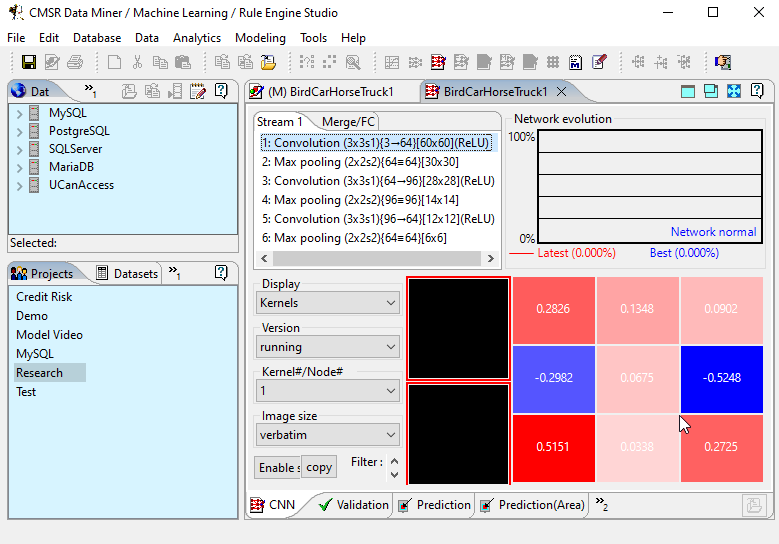
3. Now you have created a model. The following shows the model created. Next is to train it.
[ Training Network ]1. While keeping the model created in front, press the following button of the tool bar again.
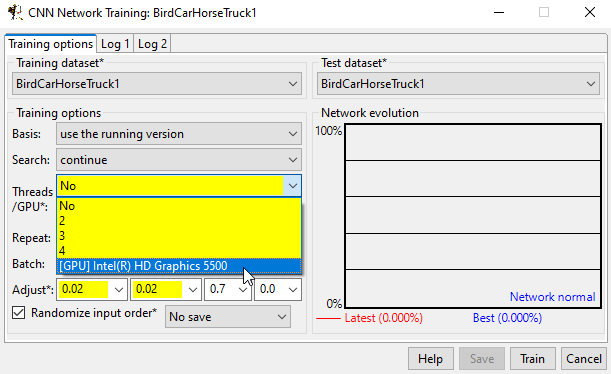
2. Then the following dialog will show up. You can choose
GPU, batch size, etc.
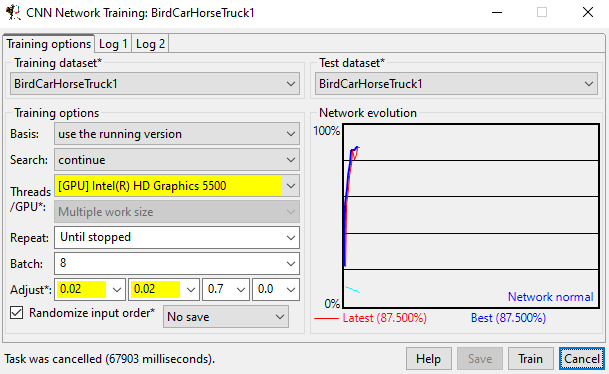
3. Monitor the network evolution chart to determine whether network is fully trained or not training properly. It shows evolution of accuracy. When finished, press the "Stop" button and "Cancel". From the main window, save the model. Note that you can train and stop and resume anyway you need including using new different dataset with additional data, etc.
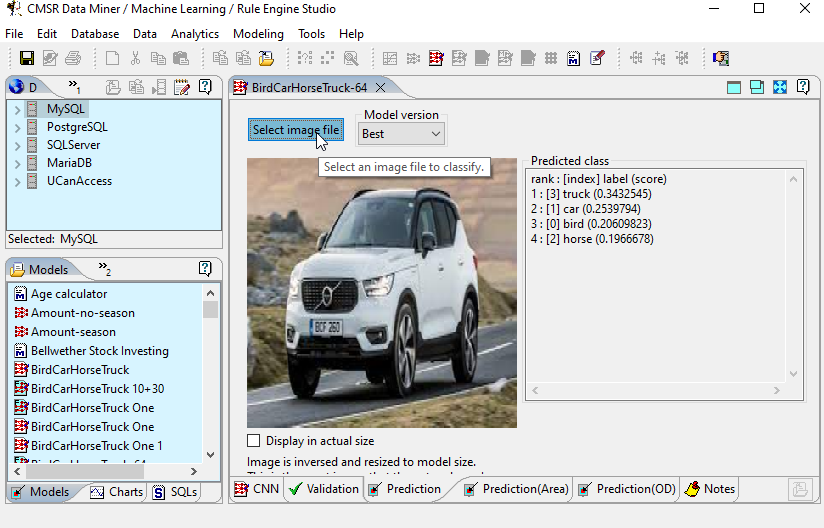
[ Verification of Model ]1. Model can be tested with image by image. From the model's "Prediction" tab, press the "Select image file" and choose an image file. Then it will show result.
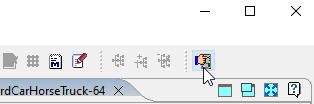
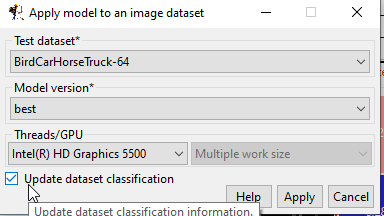
2. Model can be applied to an image dataset which has the same image width and height and model type. To apply, press the following apply button with hand from the tool bar.
3. Choose dataset and GPU and so on. Press the "Apply" button.
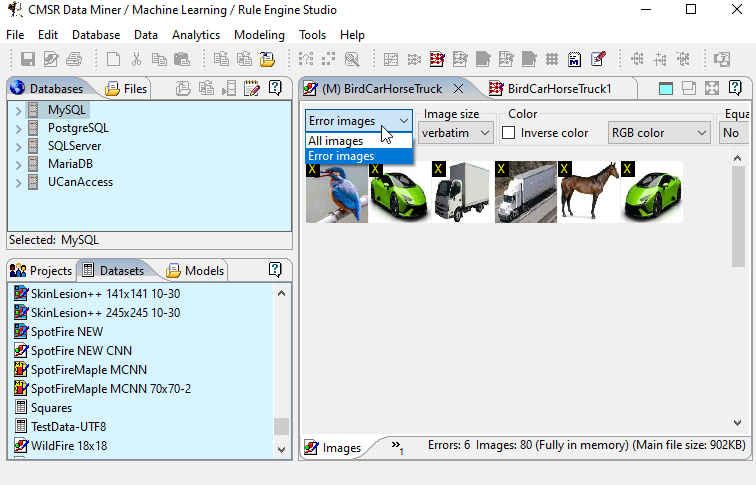
4. Once apply is finished, you can see the result from the dataset display. Select "Error images", then you can see only images with error.
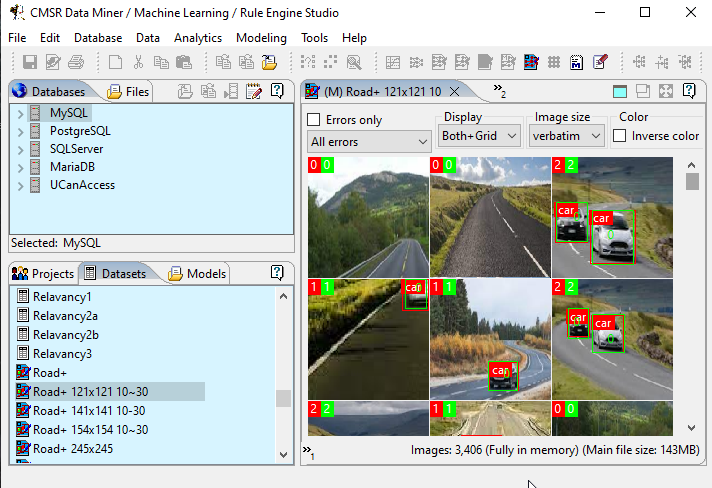
5. Classification dataset is rather boring. But object detection dataset applied with model can show detected objects as in the following figure. Red boxes are original ground truth that was fed to training. Green boxes are detected objects by the model. You can see the model is quite good on training dataset. Red and green boxes are almost same. More training data is need to perform well on unseen data.
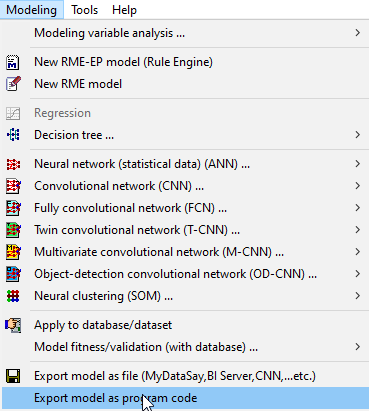
[ Model Code and Parameter File Generation ]1. To embed a model into your application, you need to create program source code. For example, C++ needs to create header and body main files. In addition, you need to create model parameter file. These files and additional download files are included in your project and compiled together. To generate program code, keeping your model in front, select "Export model as program code" from the "Modeling" menu.
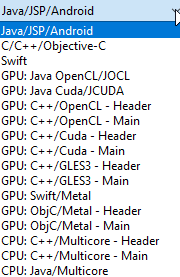
2. Then choose program type and name as in the following list. To create model parameter file, choose "Export model file (___)" and select your file.
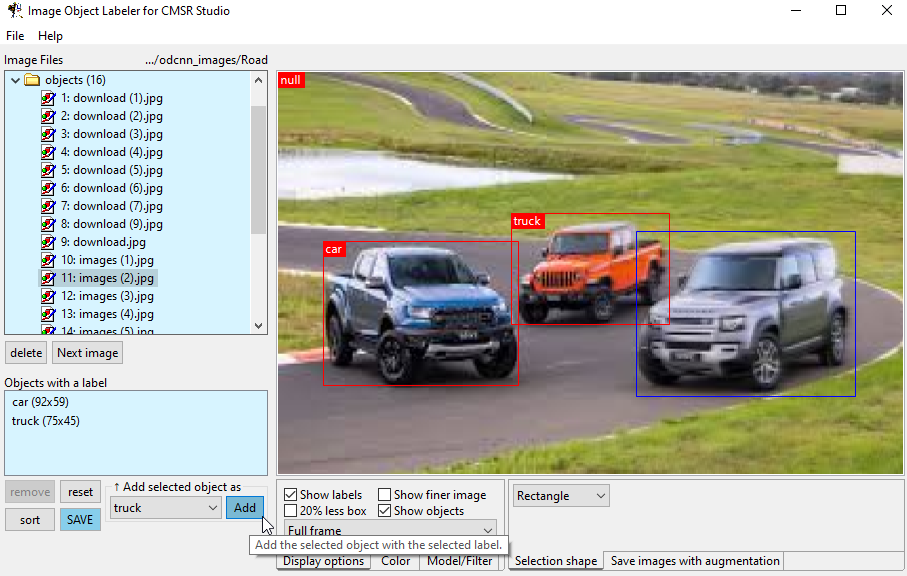
[ Labeling Objects ]Object detection requires objects in training data images to be marked with a bounding box and a classification label name. In the following figure, two objects in red box are added in the object list (located at the bottom left). One blue box is a selected object to be added to the object list. To mark an objec bounding box, click the mouse at the top left corner of the bounding box and drag to the bottom right corner. Select a label name and press the "Add" button. It is noted that this labeling software is also used for creating augmented images: cropping and rotating.
|

|
|||||||||||